This guide will walk you through the process of uploading your LiDAR (.las, .laz) files and viewing your LiDAR in FusionMap
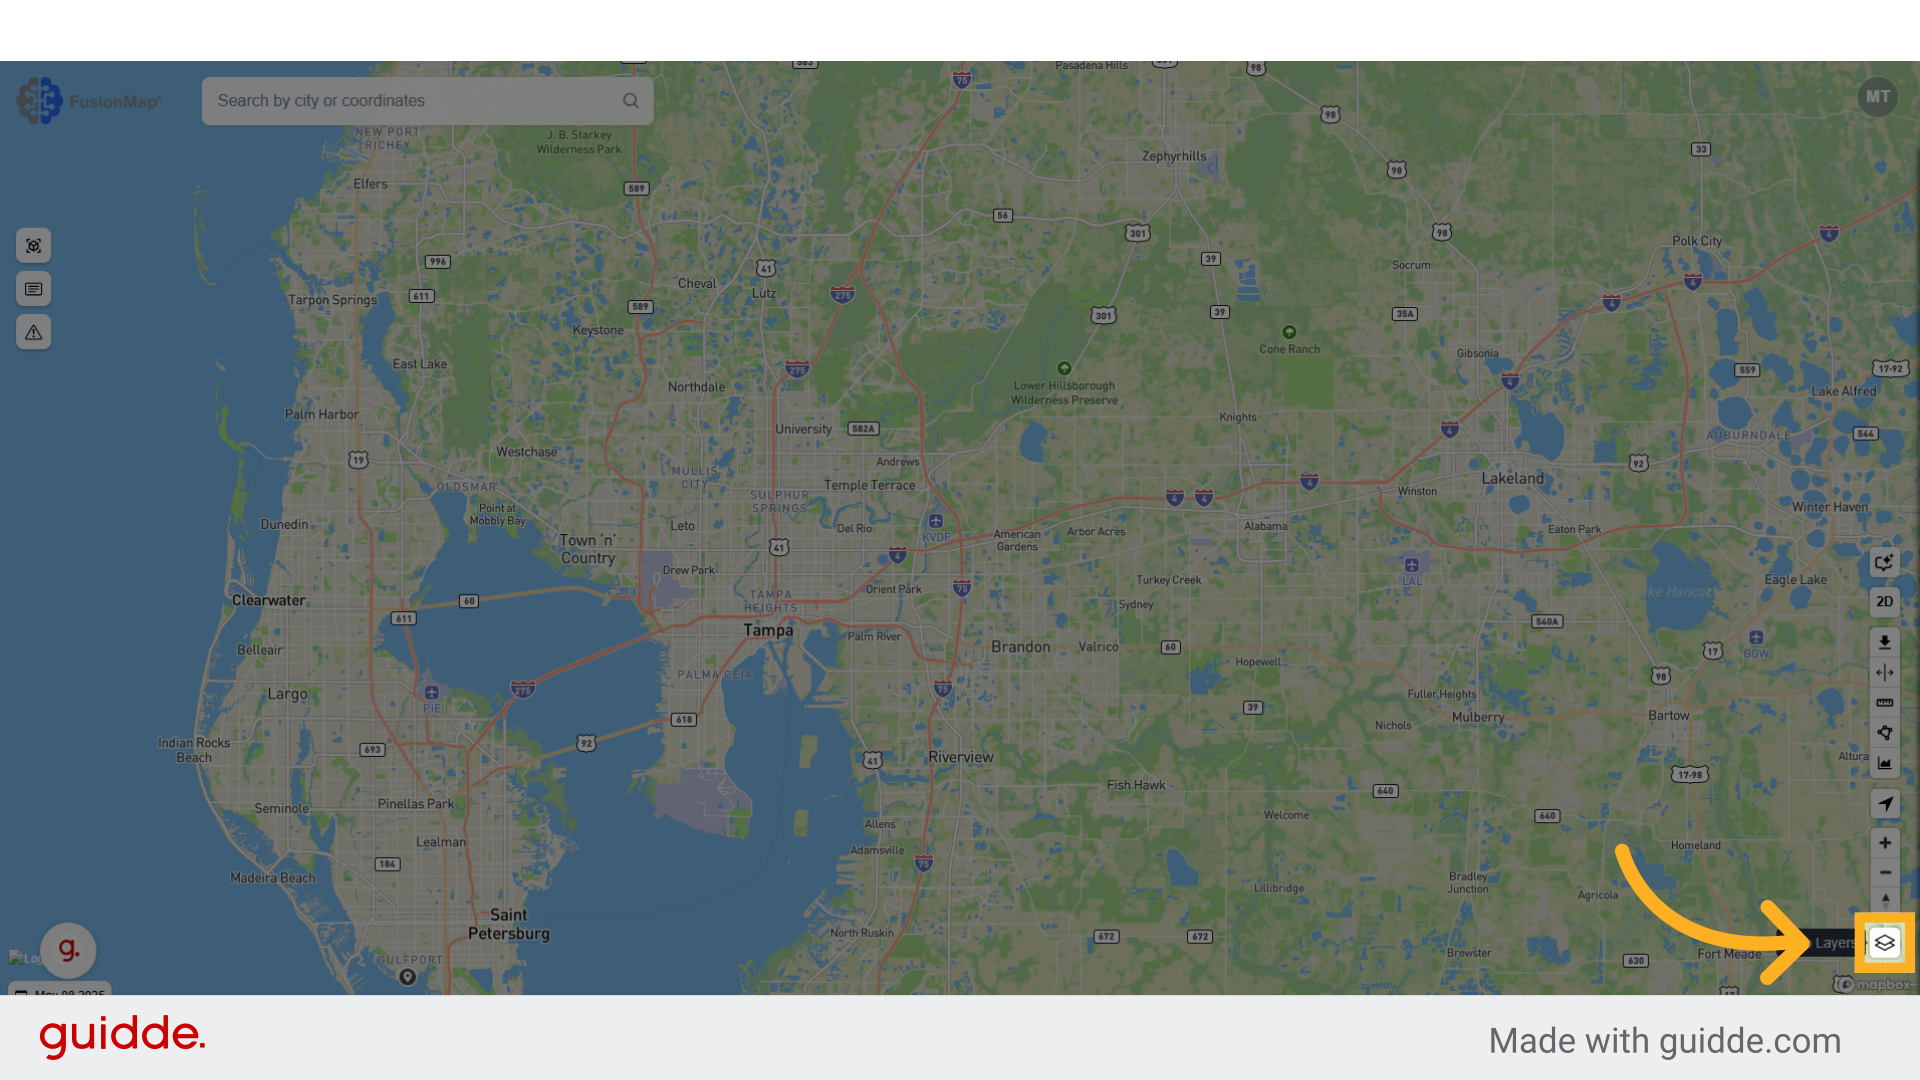
1. Open Layers
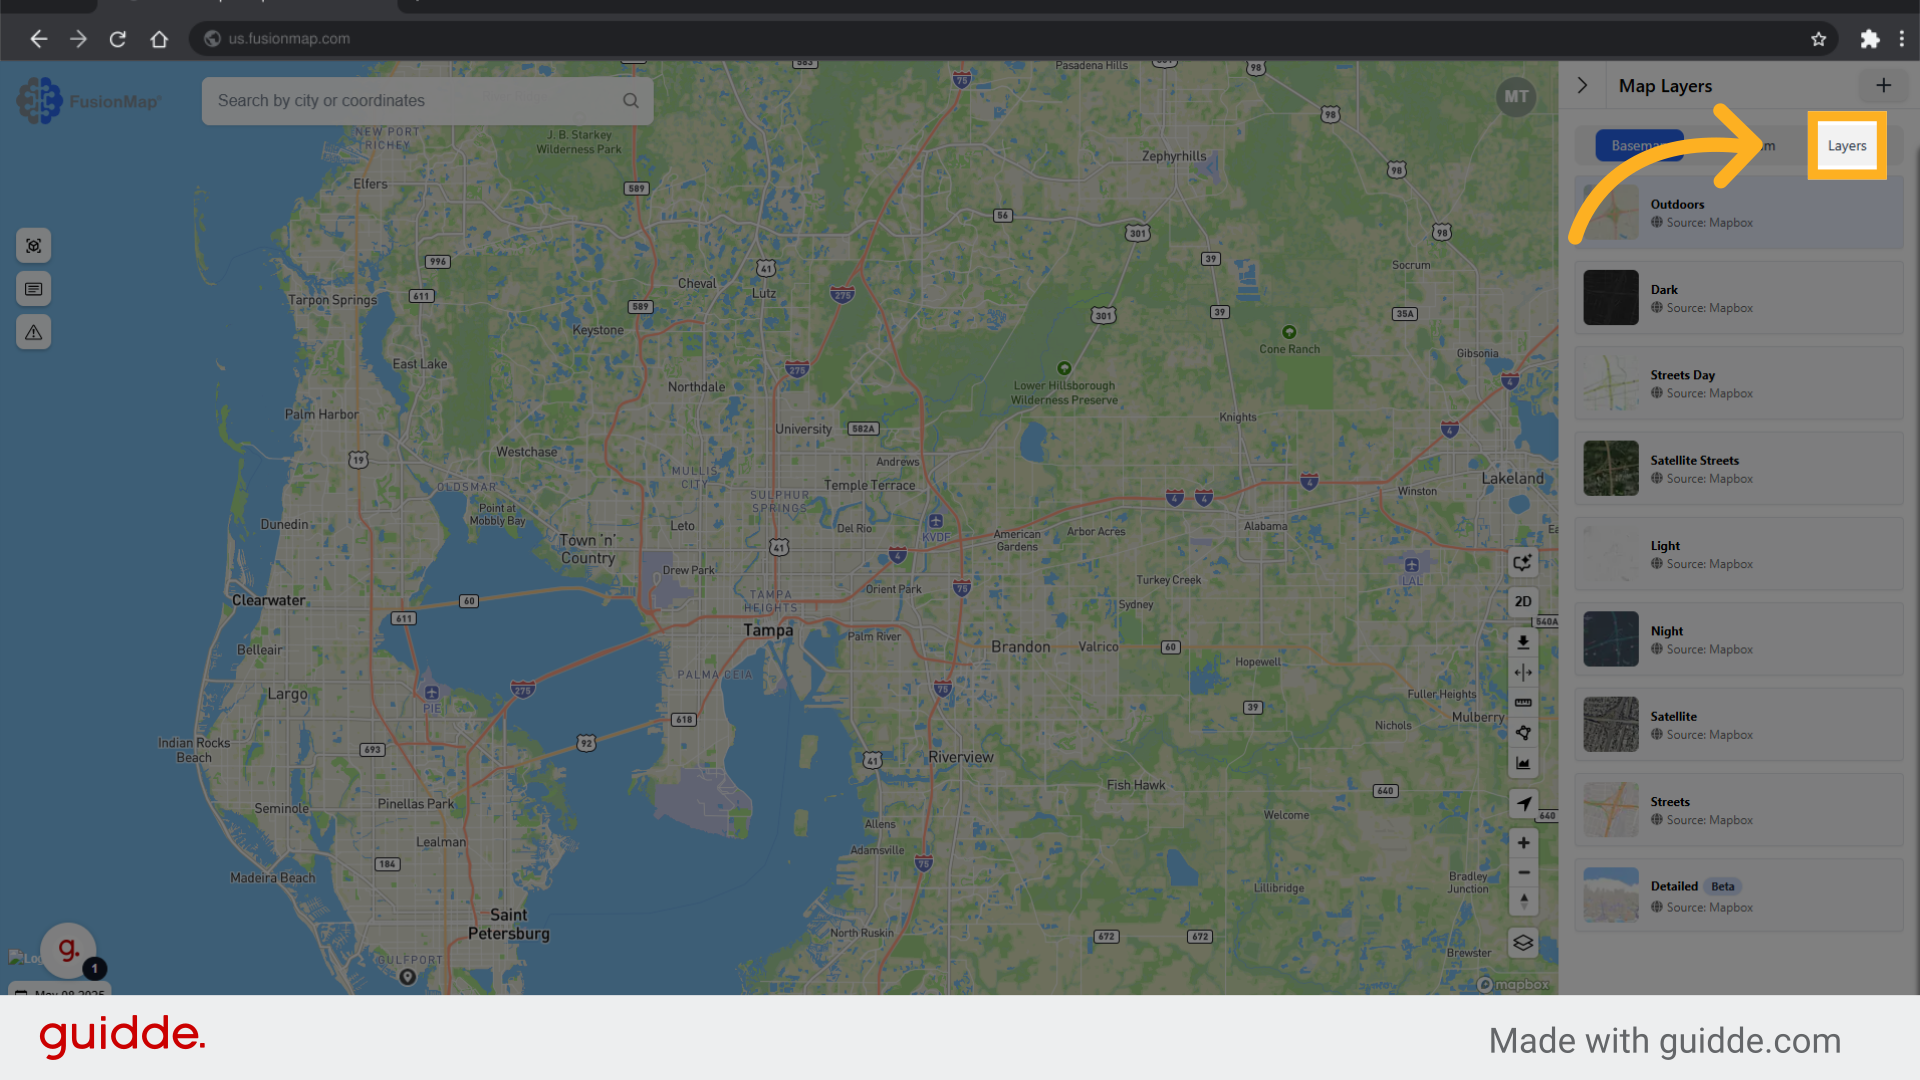
2. Switch to the "layers" tab
3. Click "Add Layer"
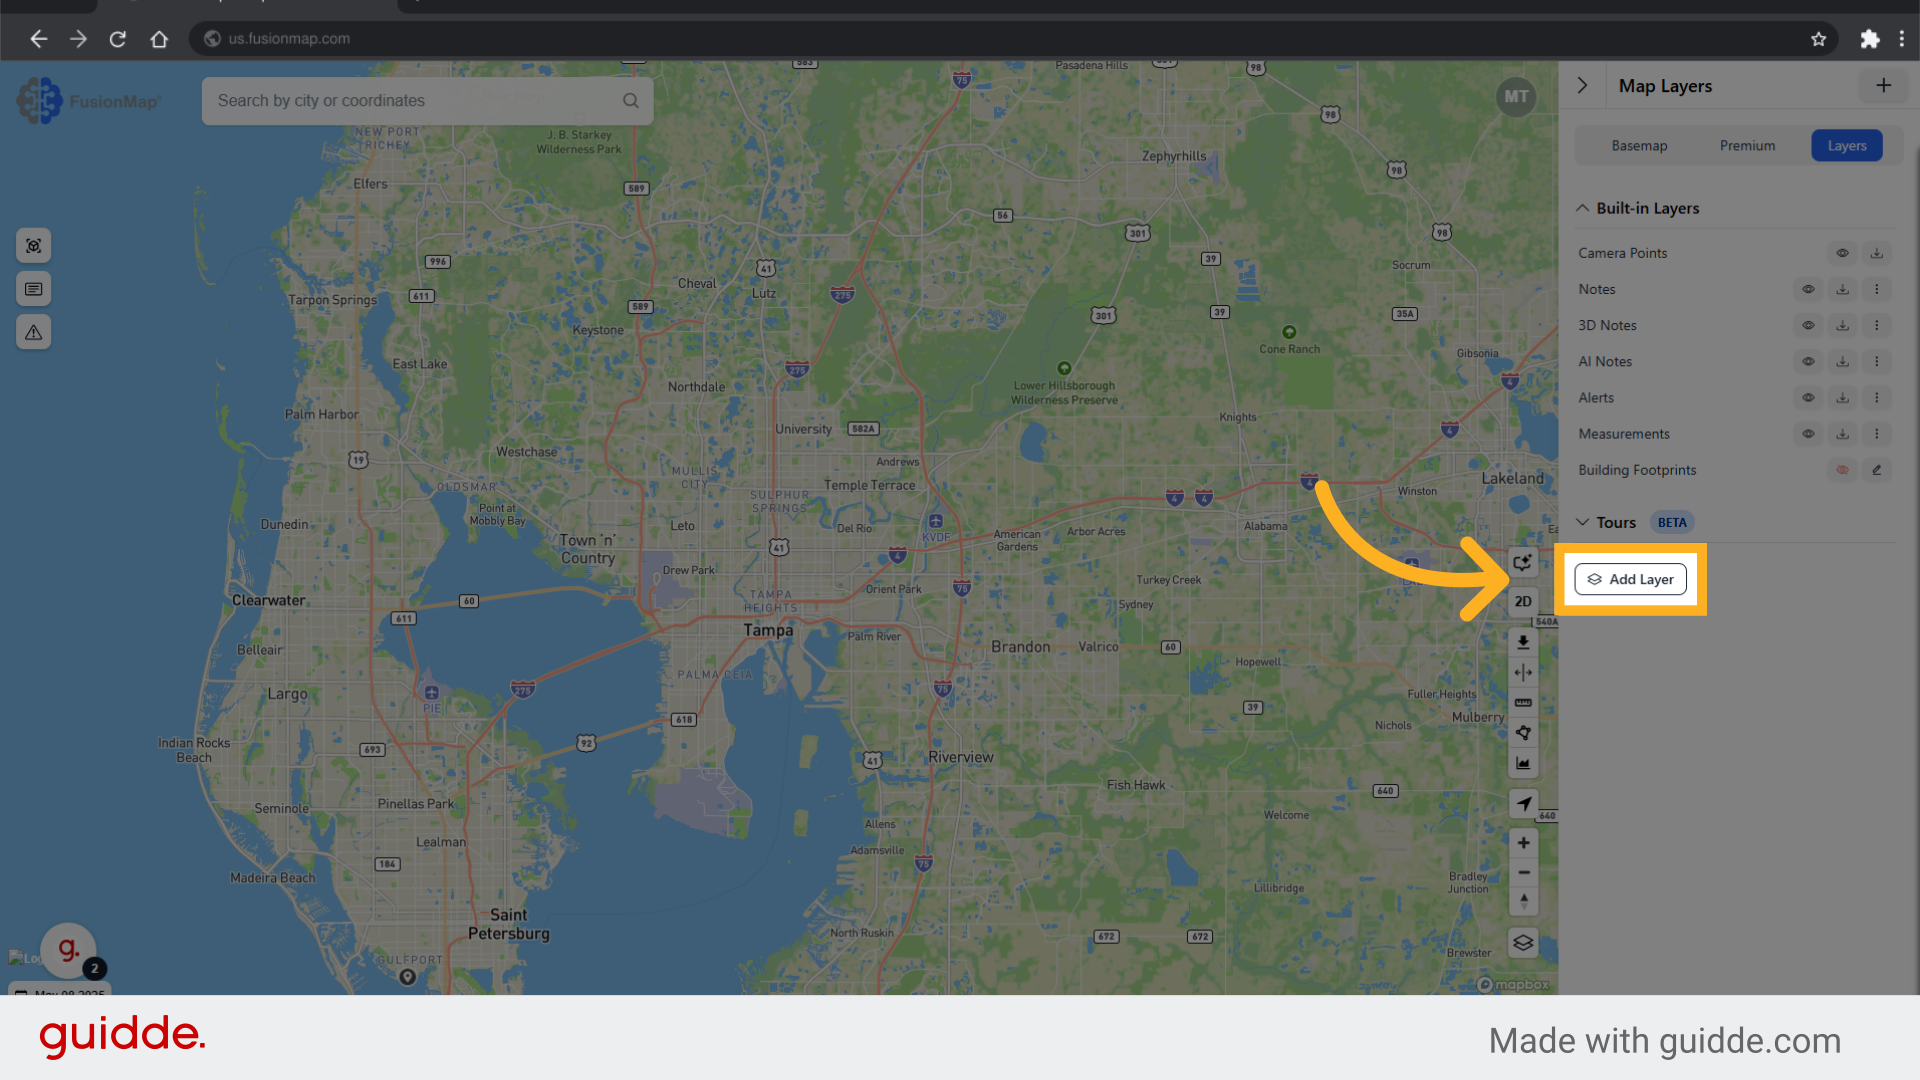
4. Change layer type to "LAS"
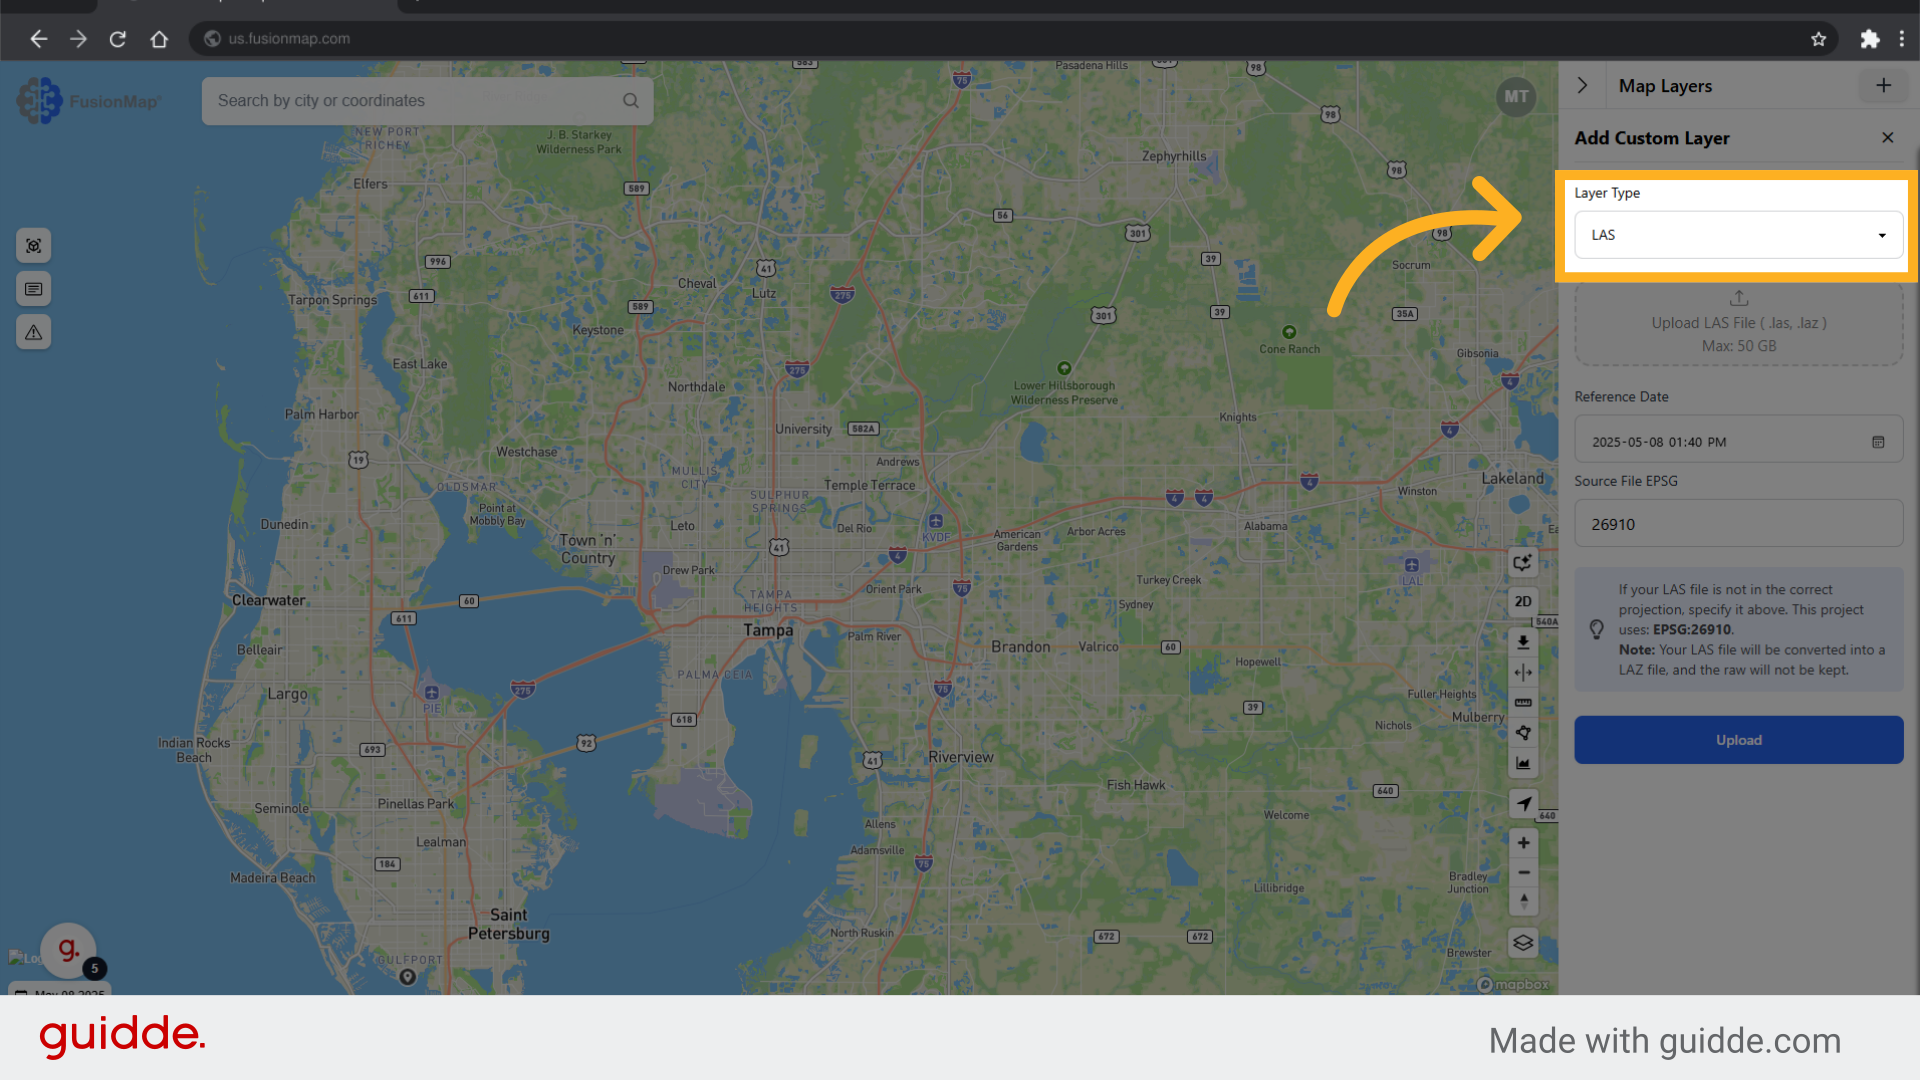
5. Upload your LAS File here

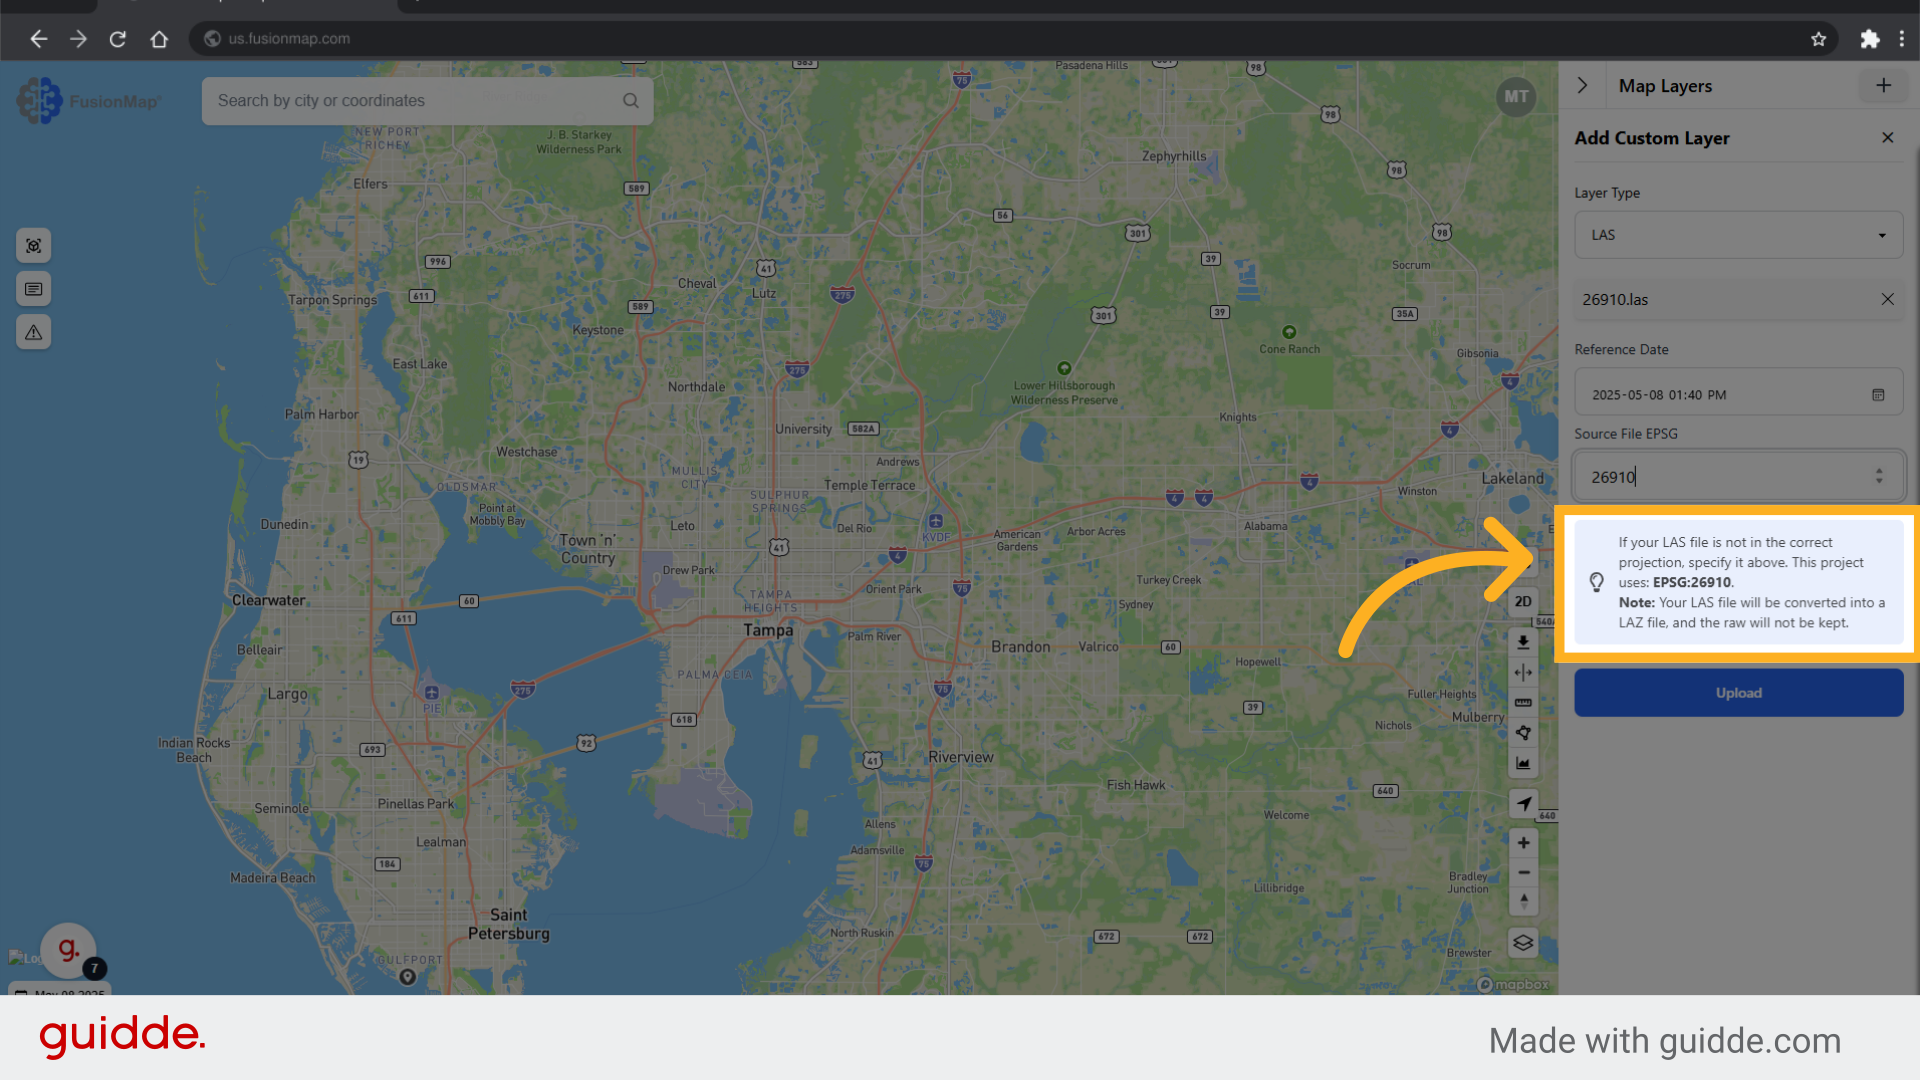
6. Input the appropriate EPSG
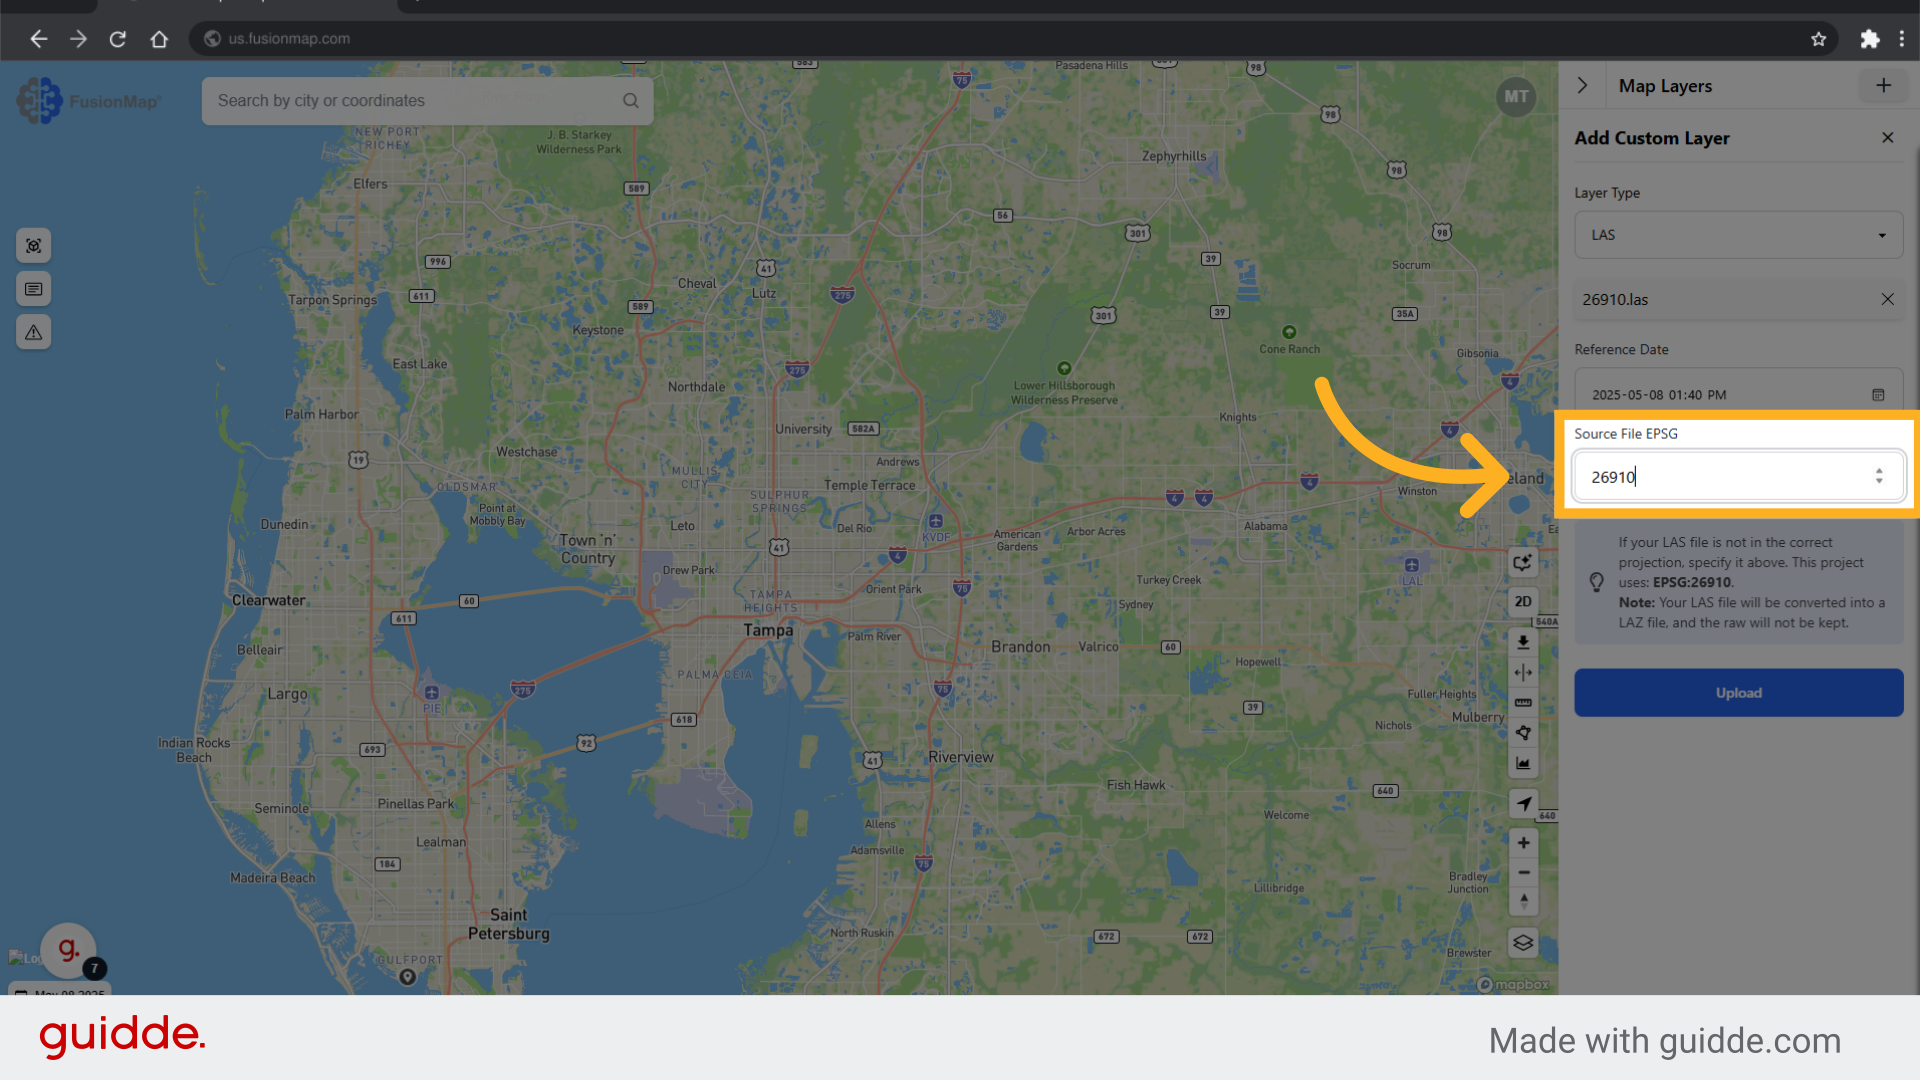
7. Remember to adjust your project's EPSG
For a tutorial on how to adjust your project's EPSG value, click here. (insert link to "Changing Project Settings)
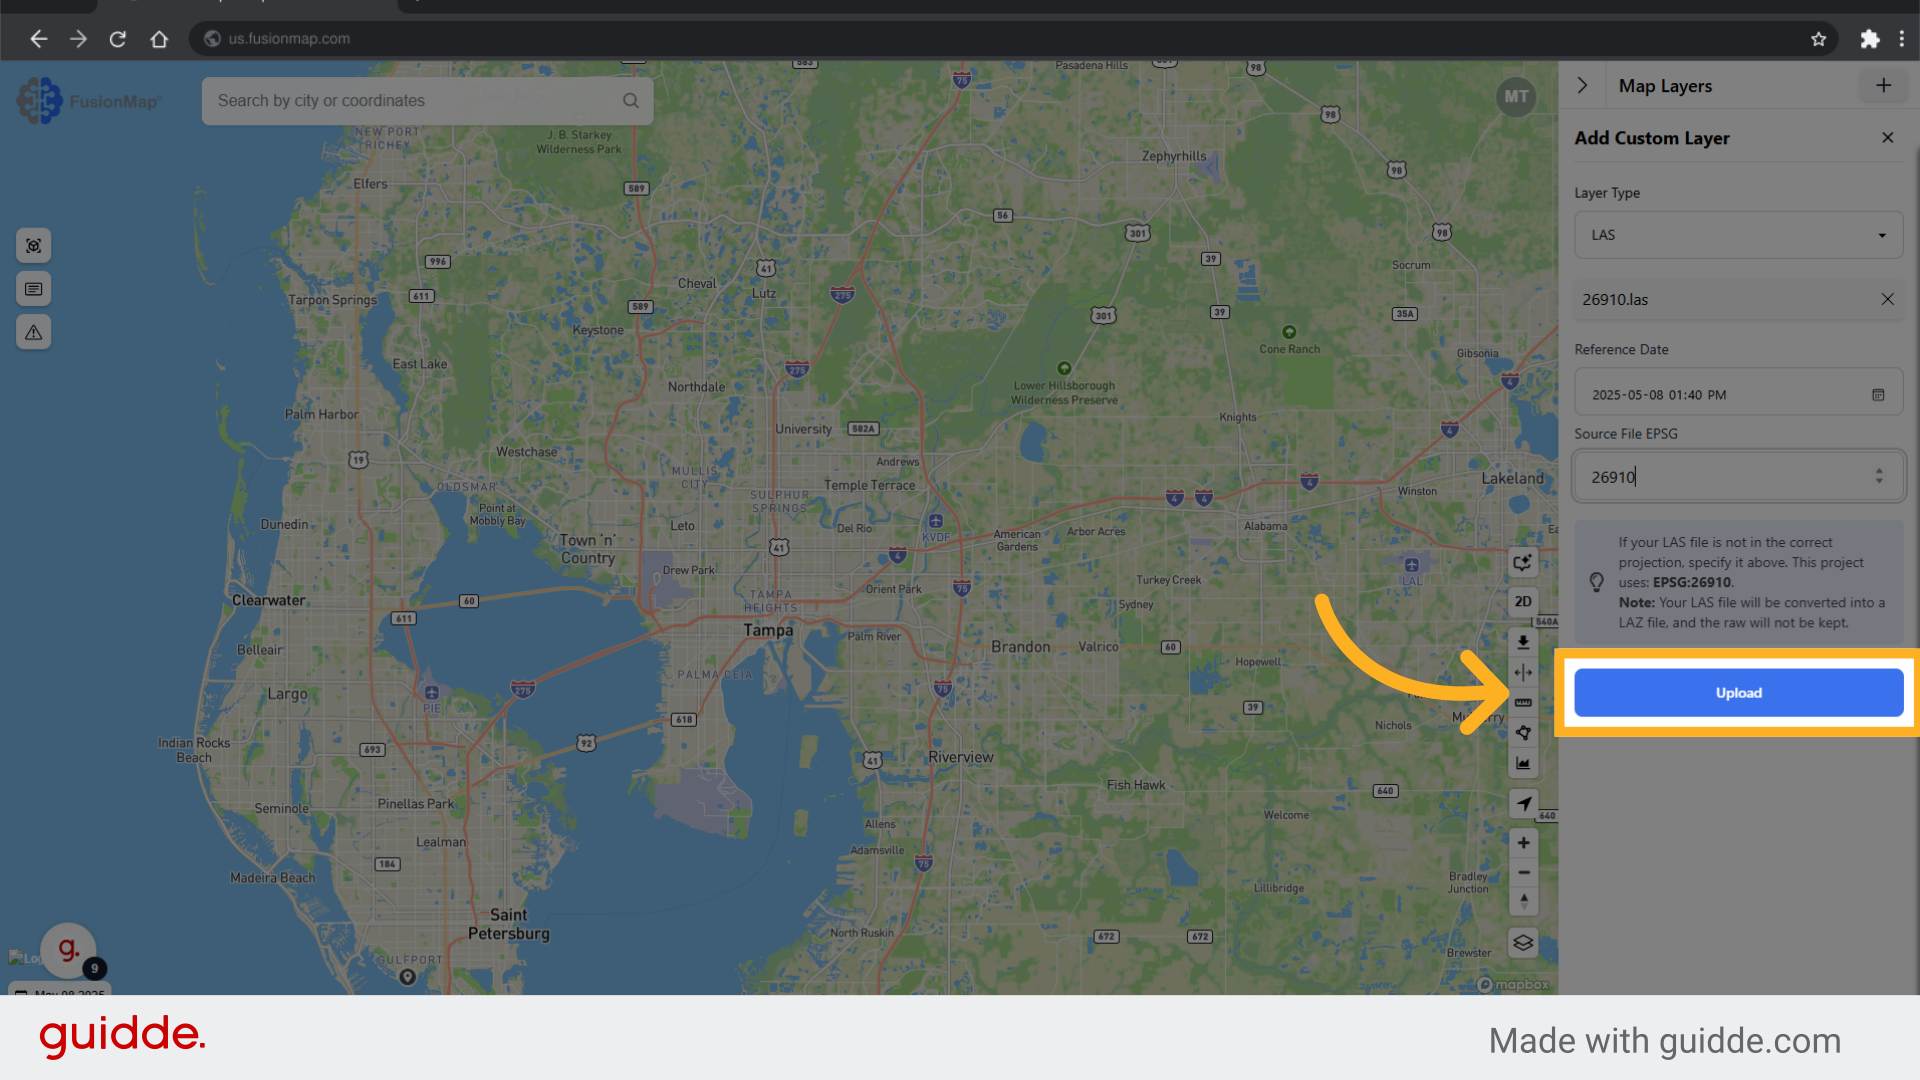
8. Click "Upload"
After clicking upload, FusionMap will process your LiDAR file. This may take anywhere from a few minutes to a few hours depending on the size of your LiDAR file.
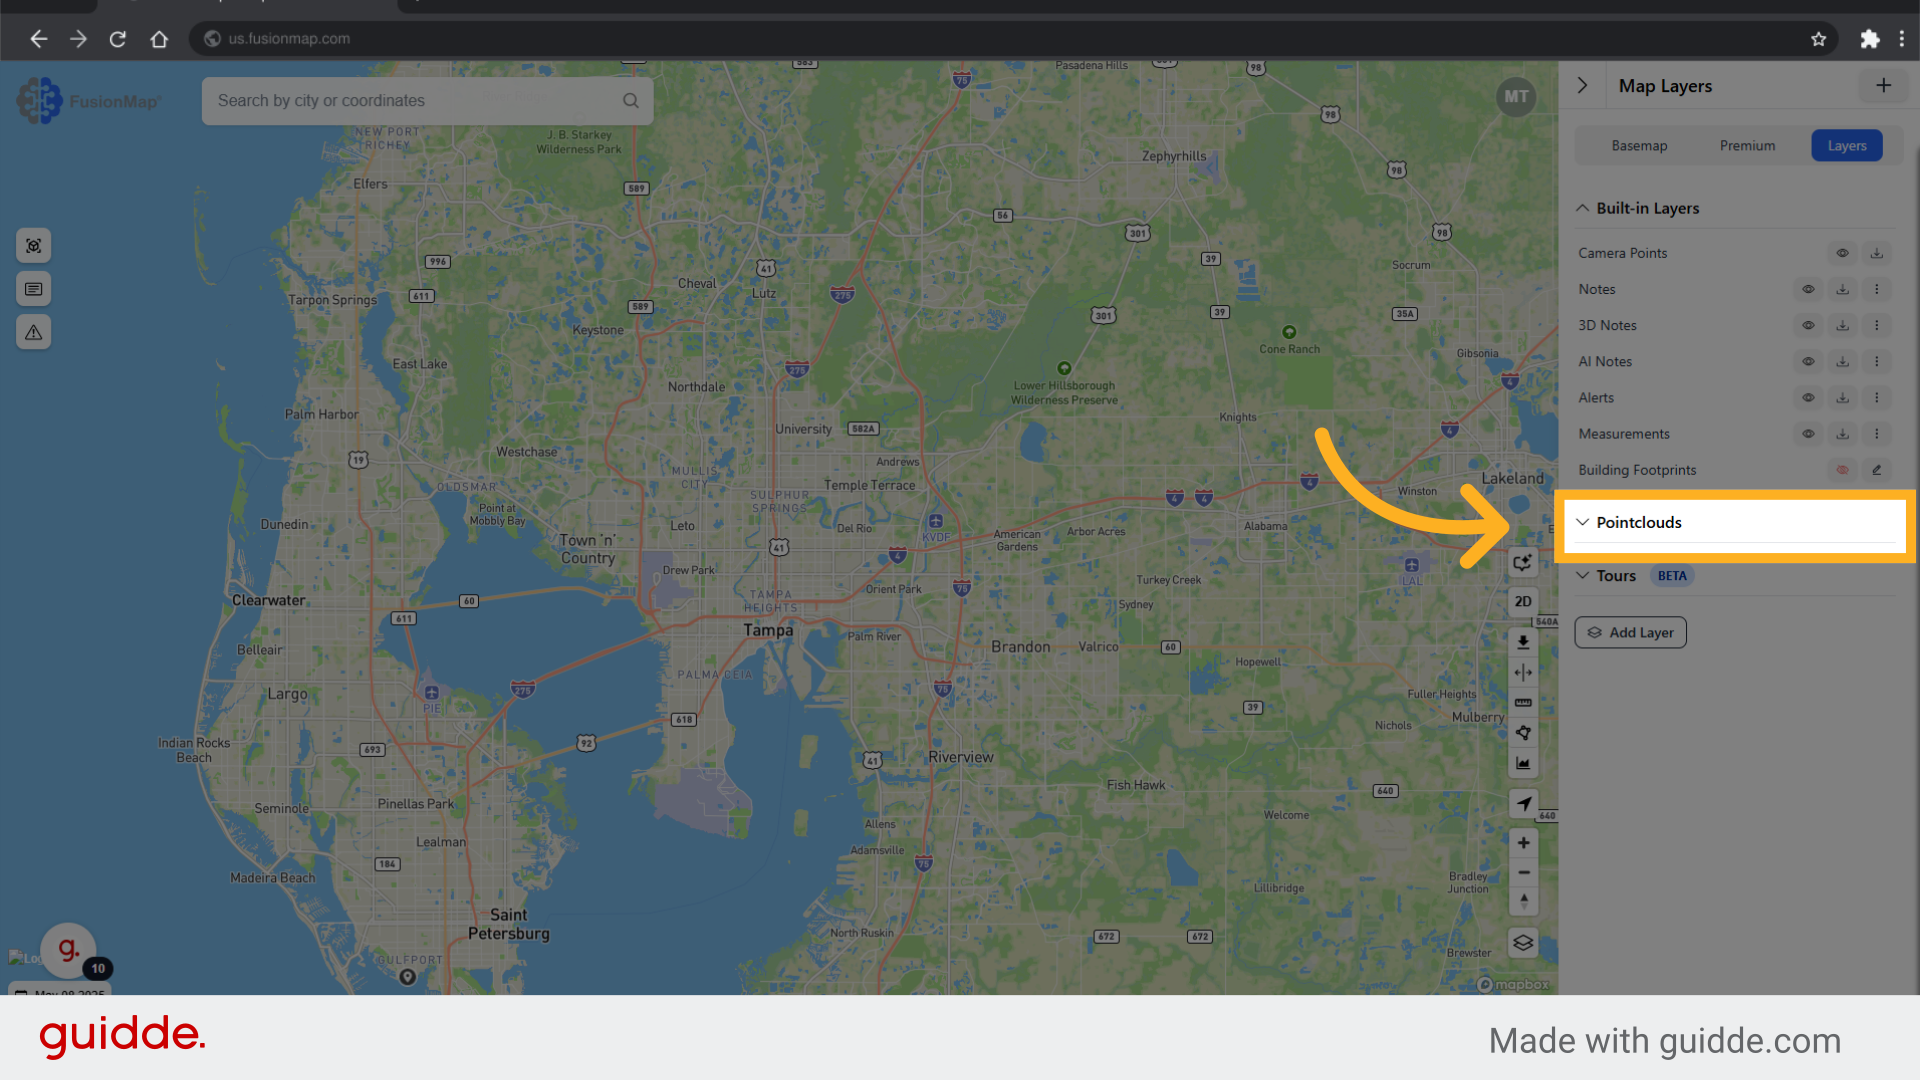
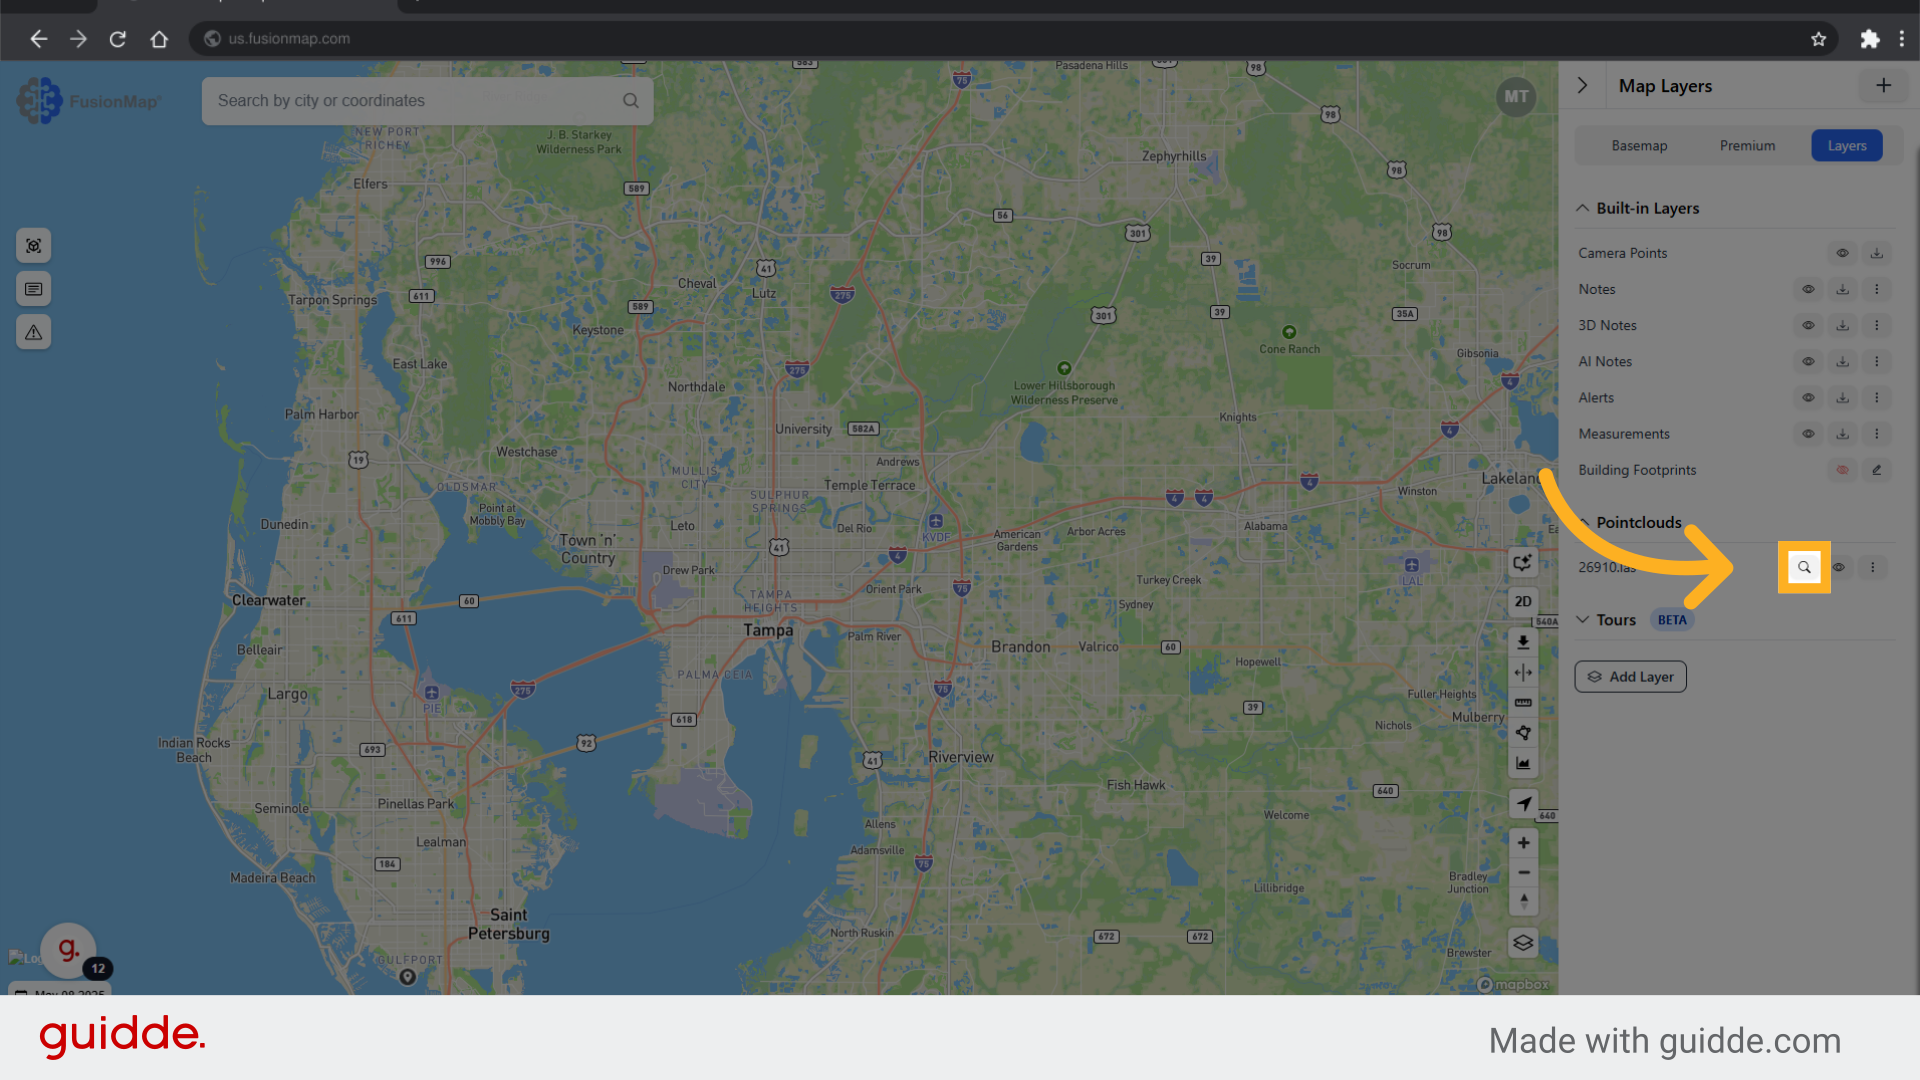
9. Open "pointclouds"
Once your LiDAR file has been uploaded and processed, open the newly generated "Pointclouds" drop down menu in the "Layers" tab.
10. Click the search icon next to your LiDAR file
Clicking the search icon will directly take you to the location of your LiDAR file on the map.
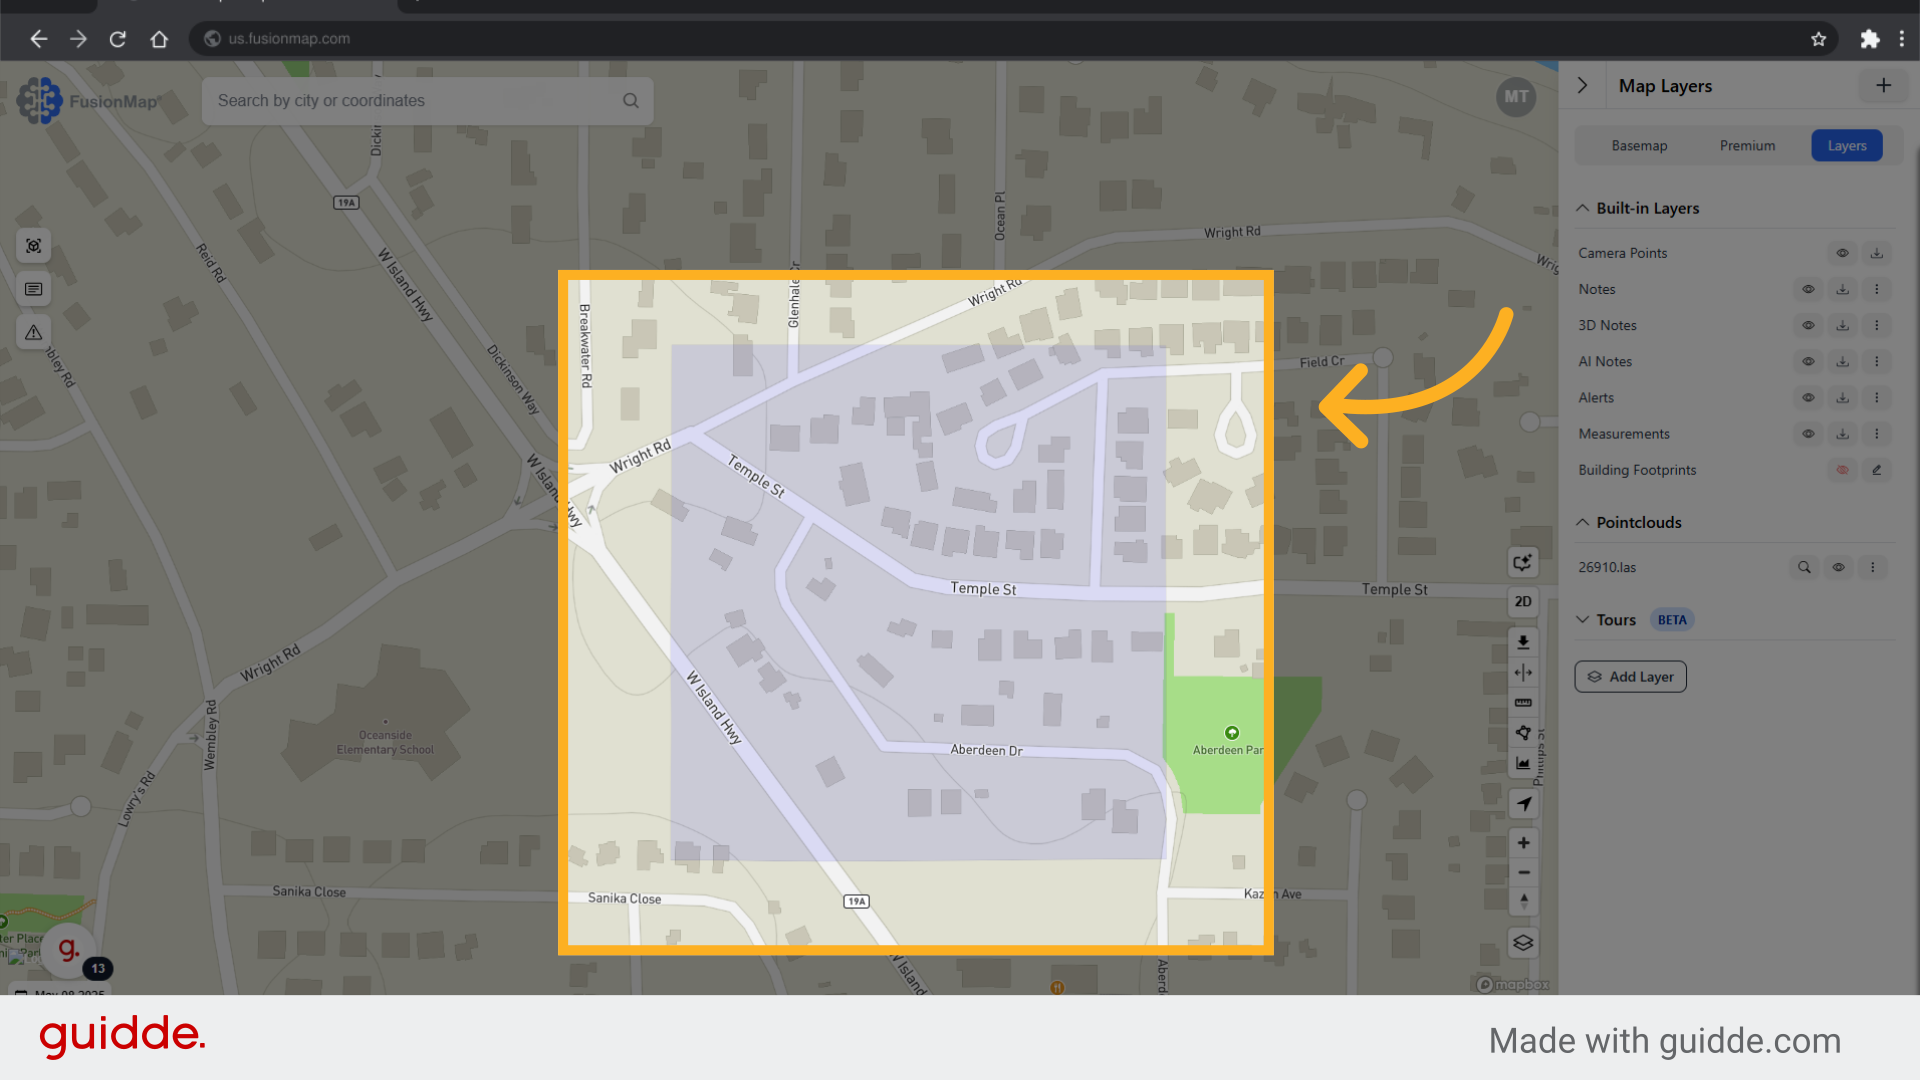
11. Click anywhere within the area
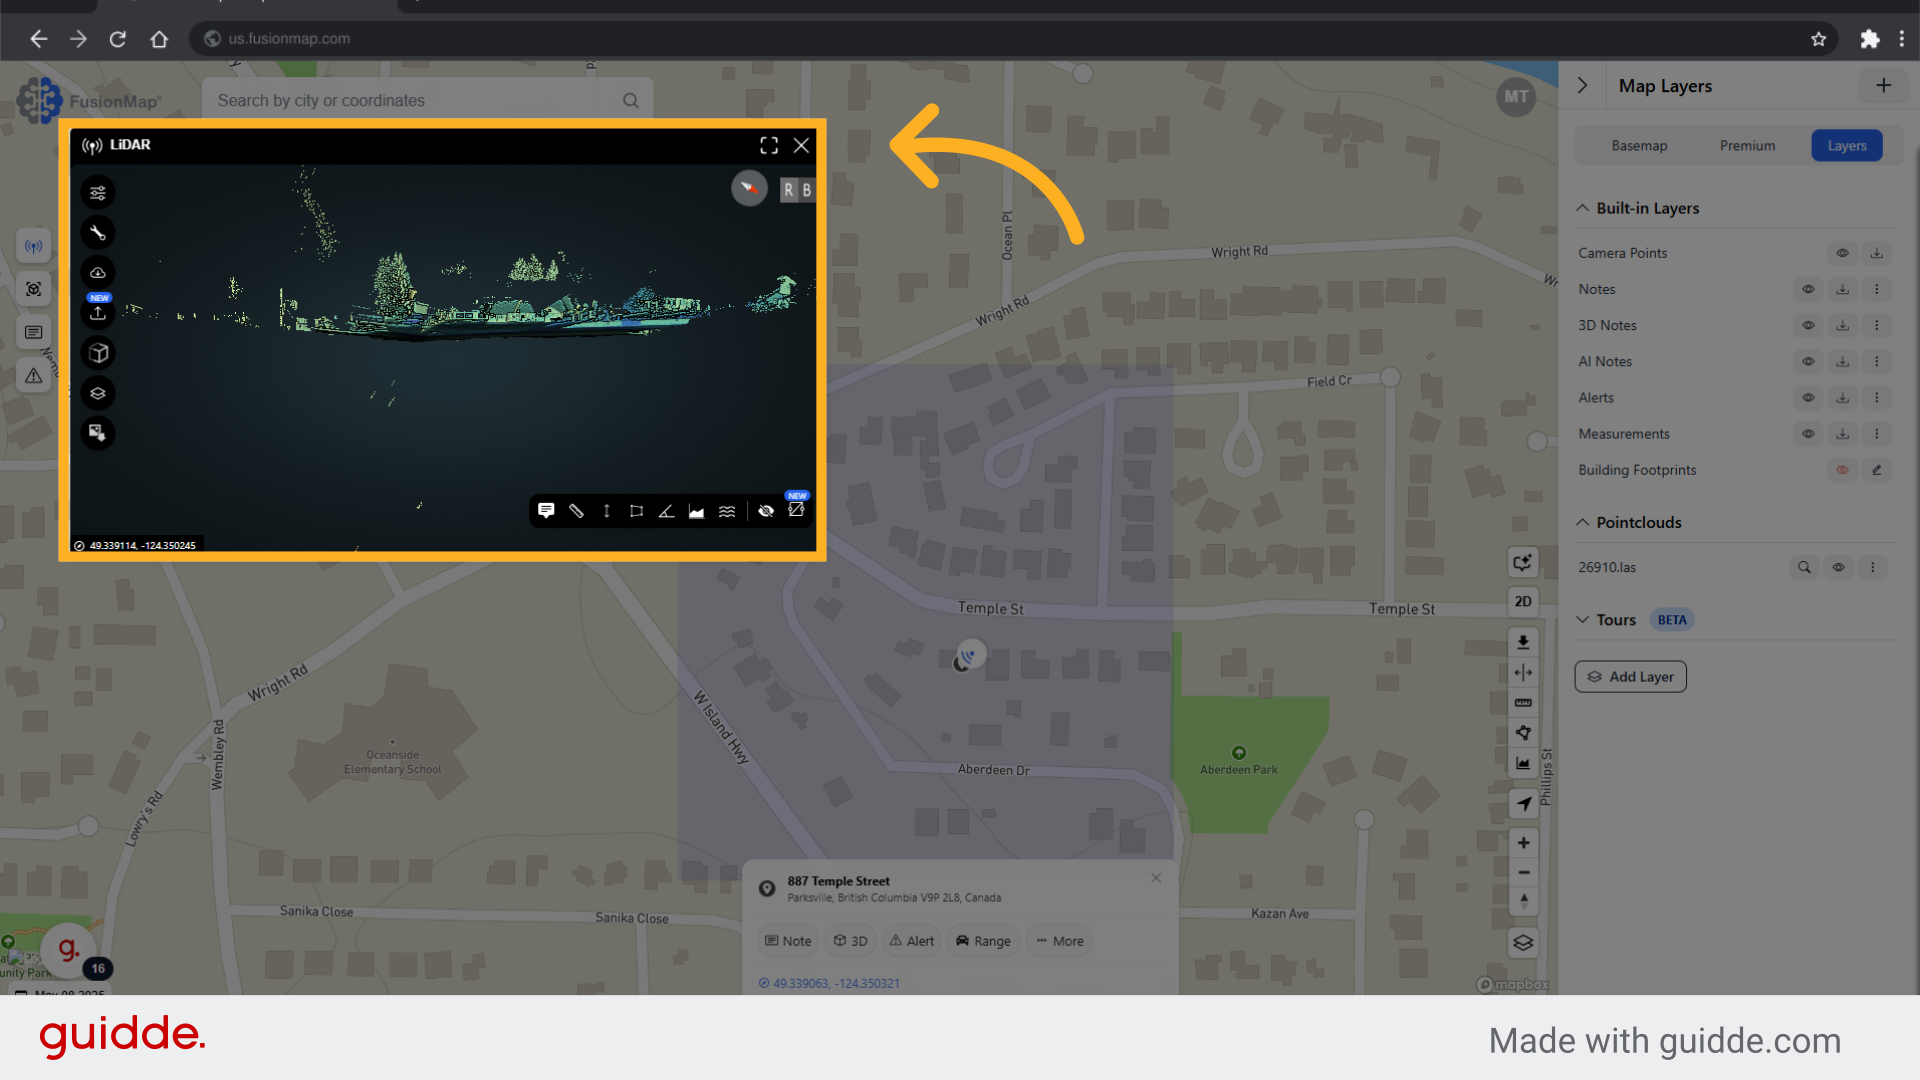
12. The LiDAR Viewer will open
For a full tutorial on how to use the LiDAR viewer, click here. (Insert link to "Views" tutorial)
This guide walks the user through uploading and viewing LiDAR data in FusionMap.