Introduction to Custom Layers
This tutorial provides an overview of how to use custom layers in FusionMap, helping you organize, display, and manage spatial data with greater flexibility.
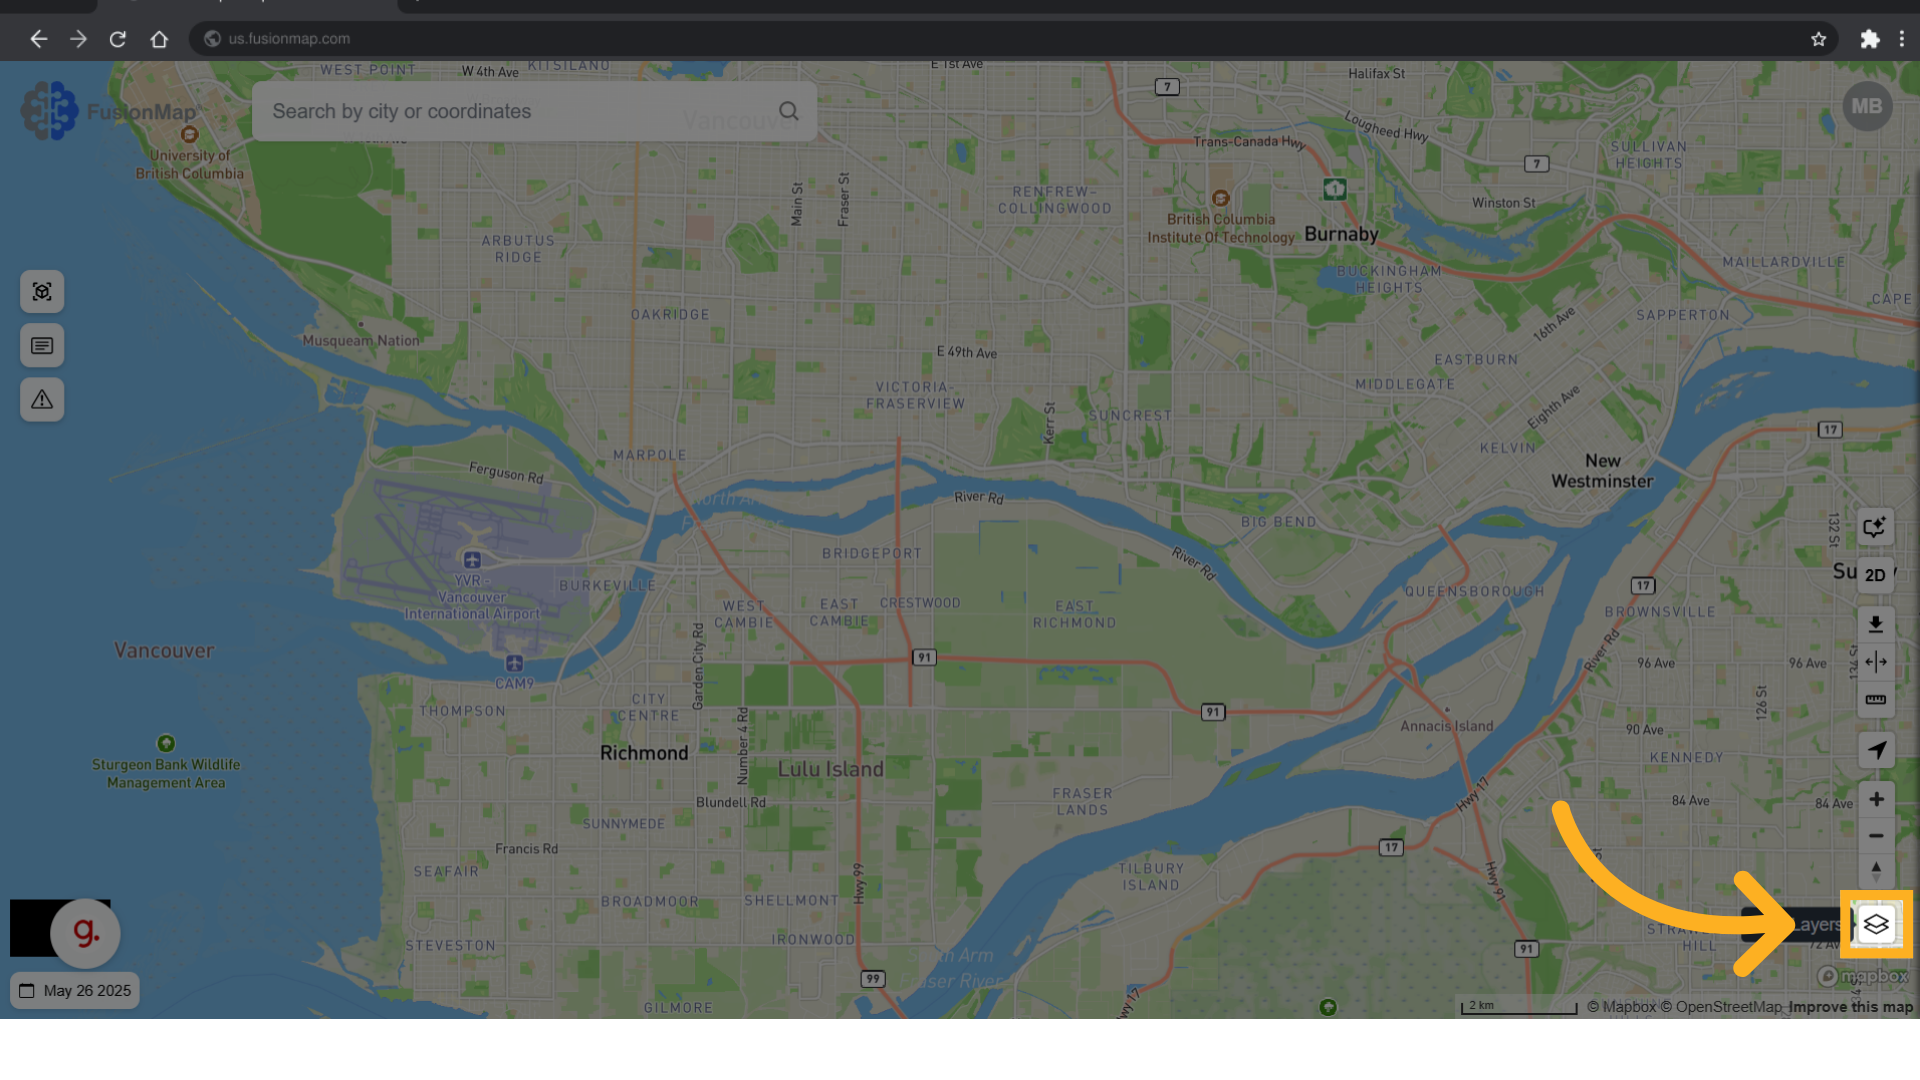
1. Click the Layers button
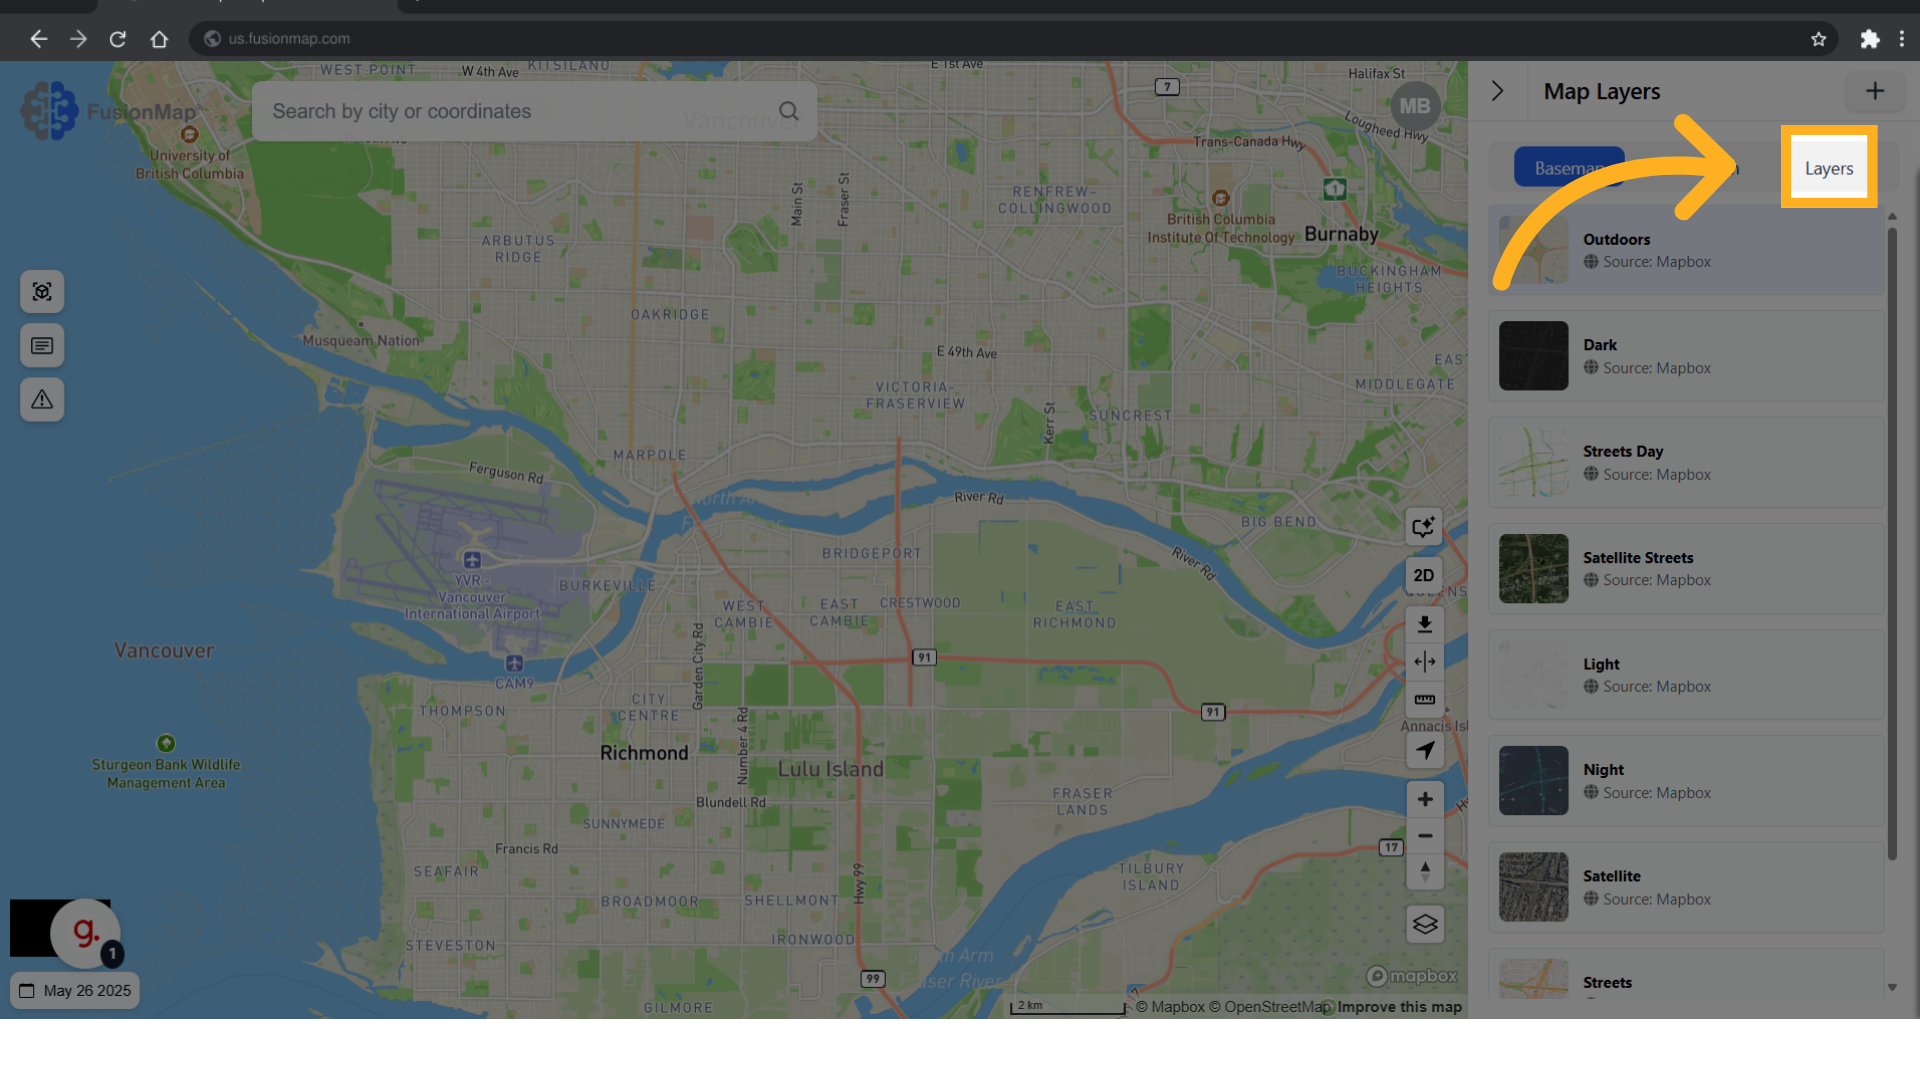
2. Click "Layers"
Navigate to the Layers tab.
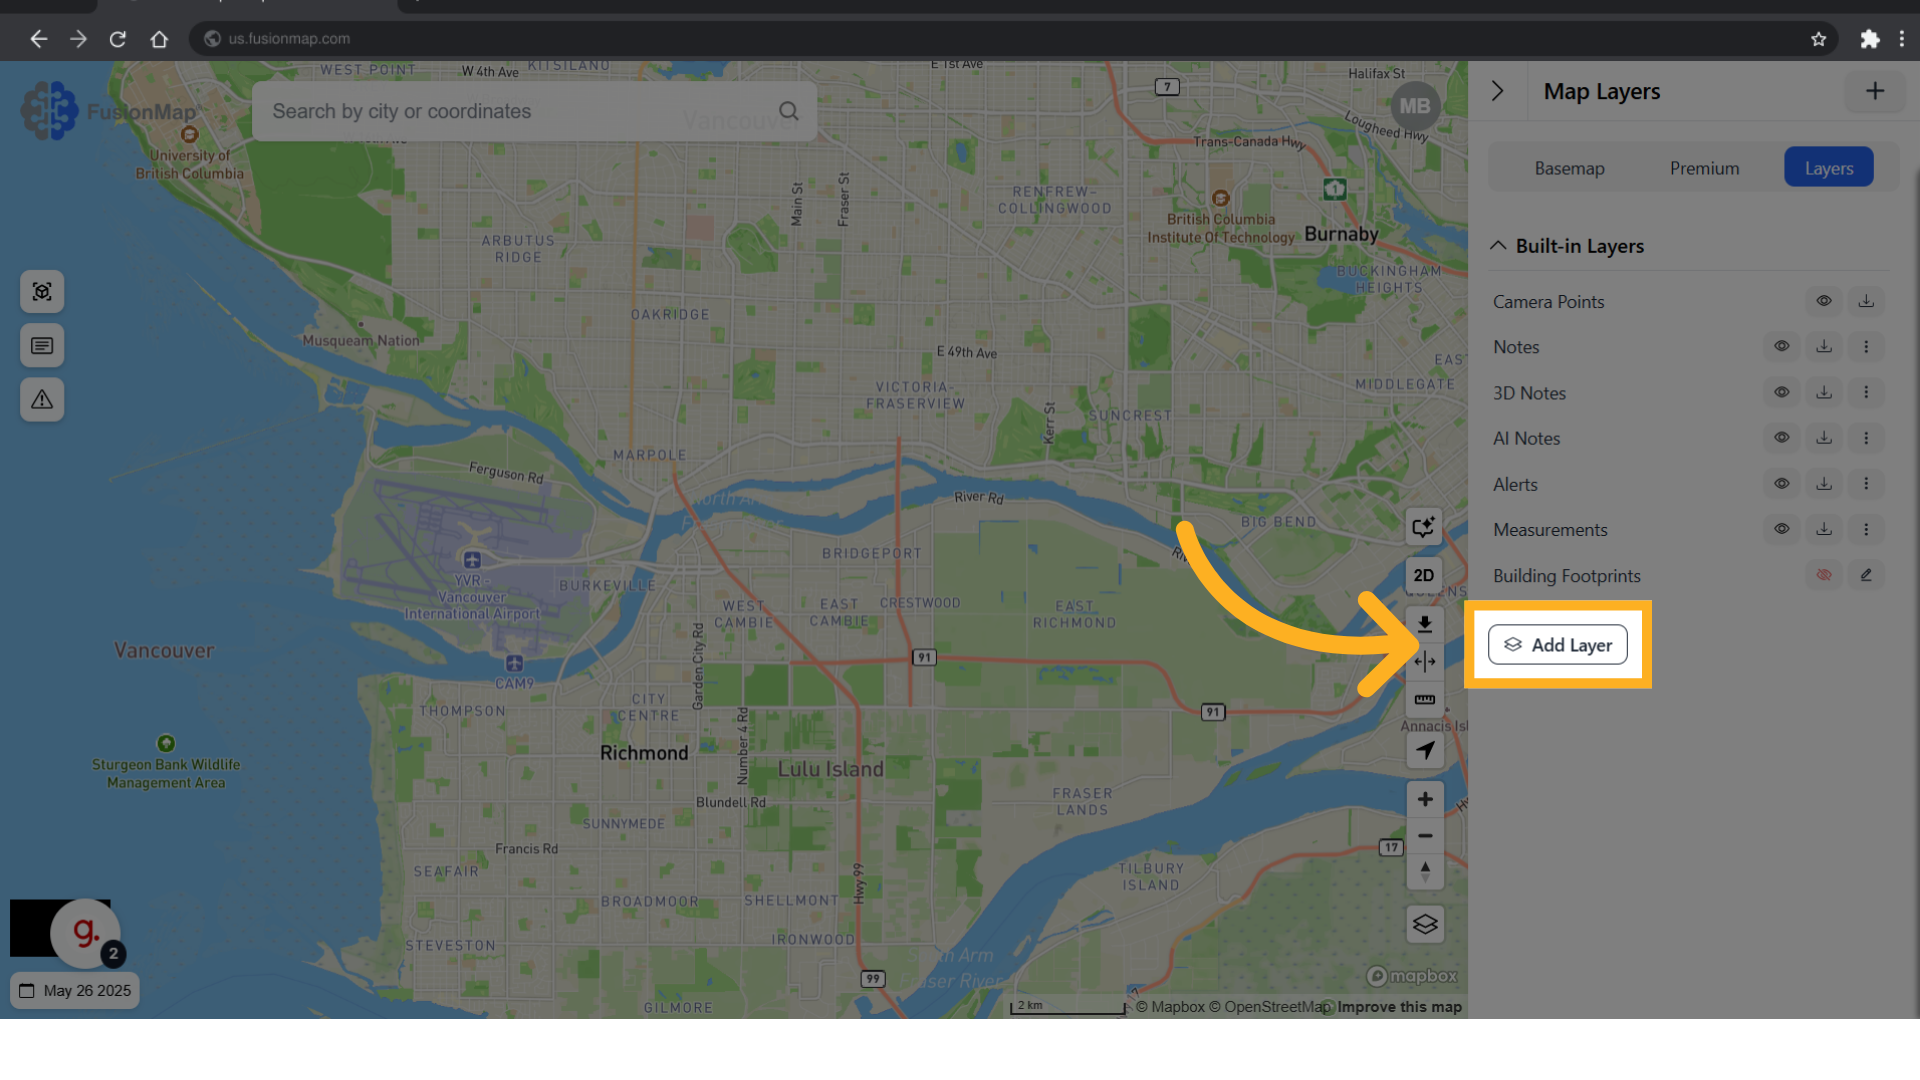
3. Click "Add Layer"
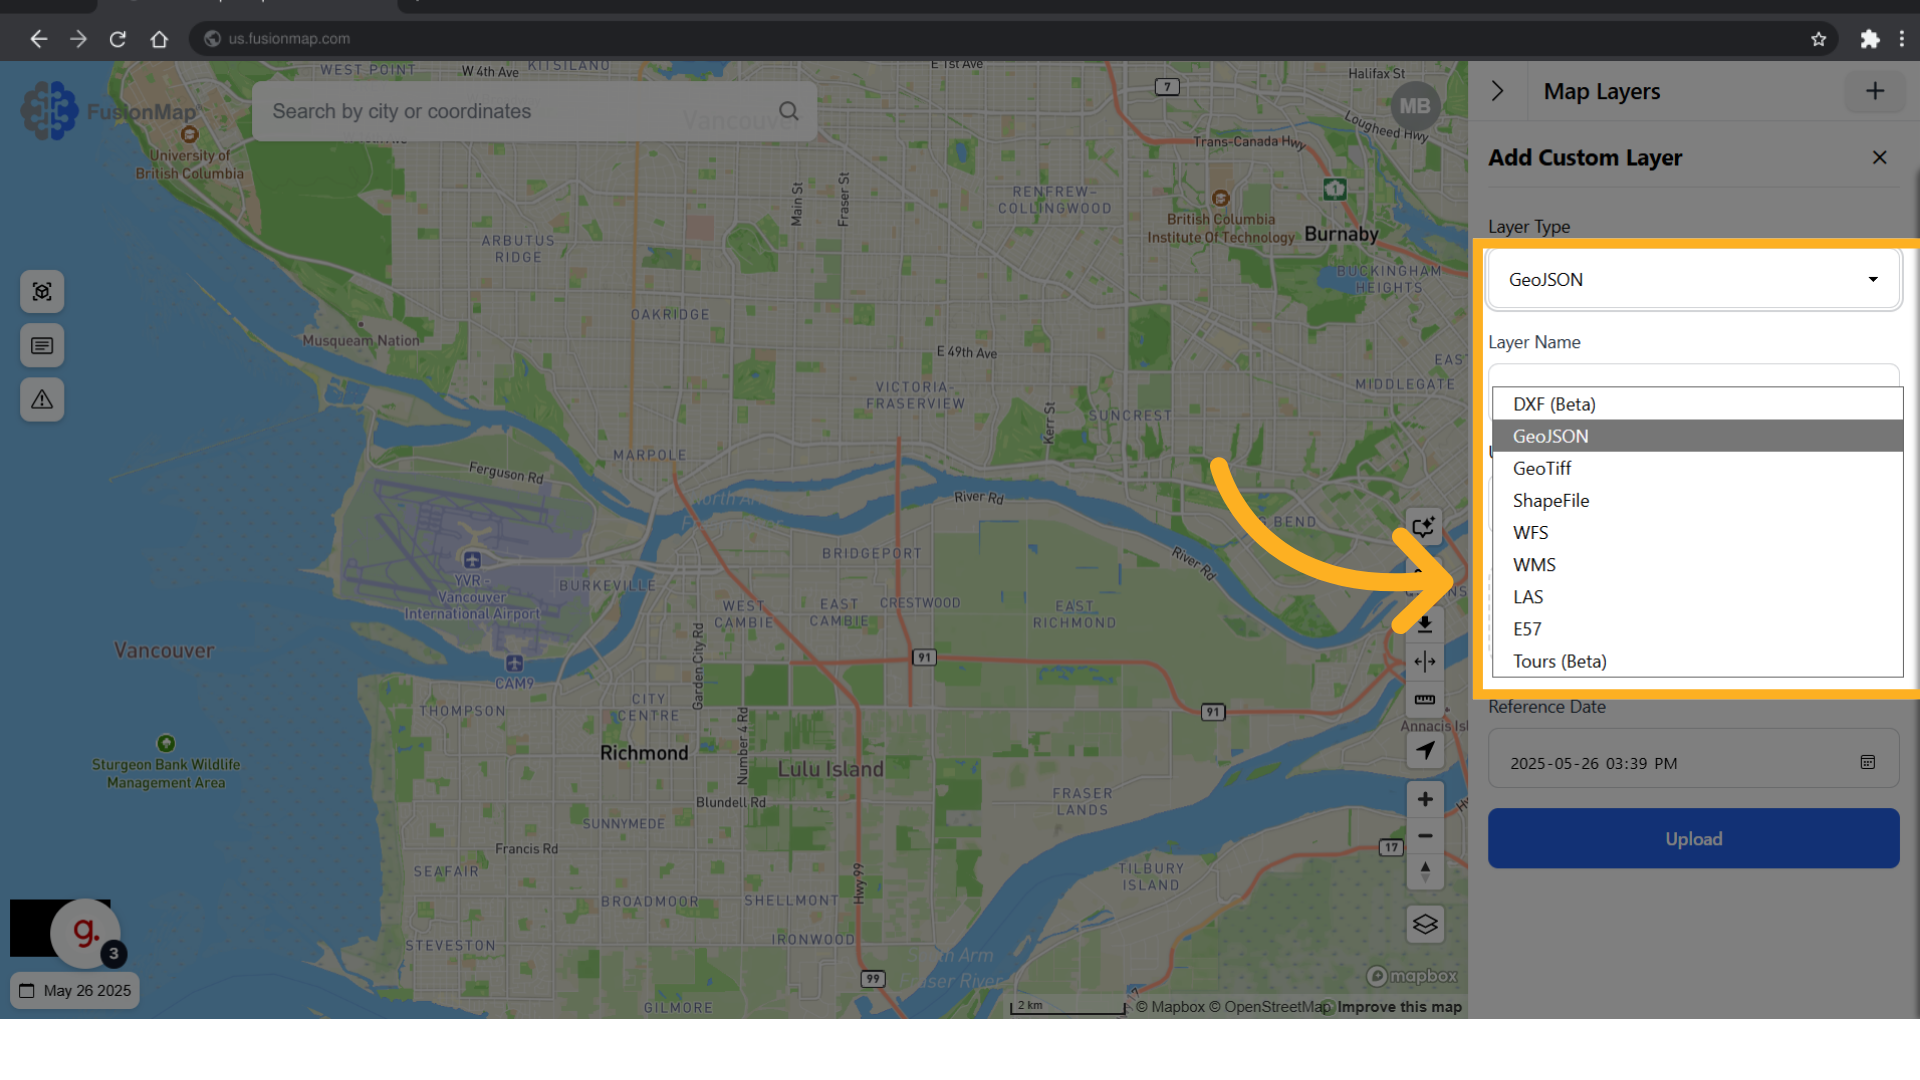
4. These are the layer types supported by FusionMap
Choose the desired file format from the list.
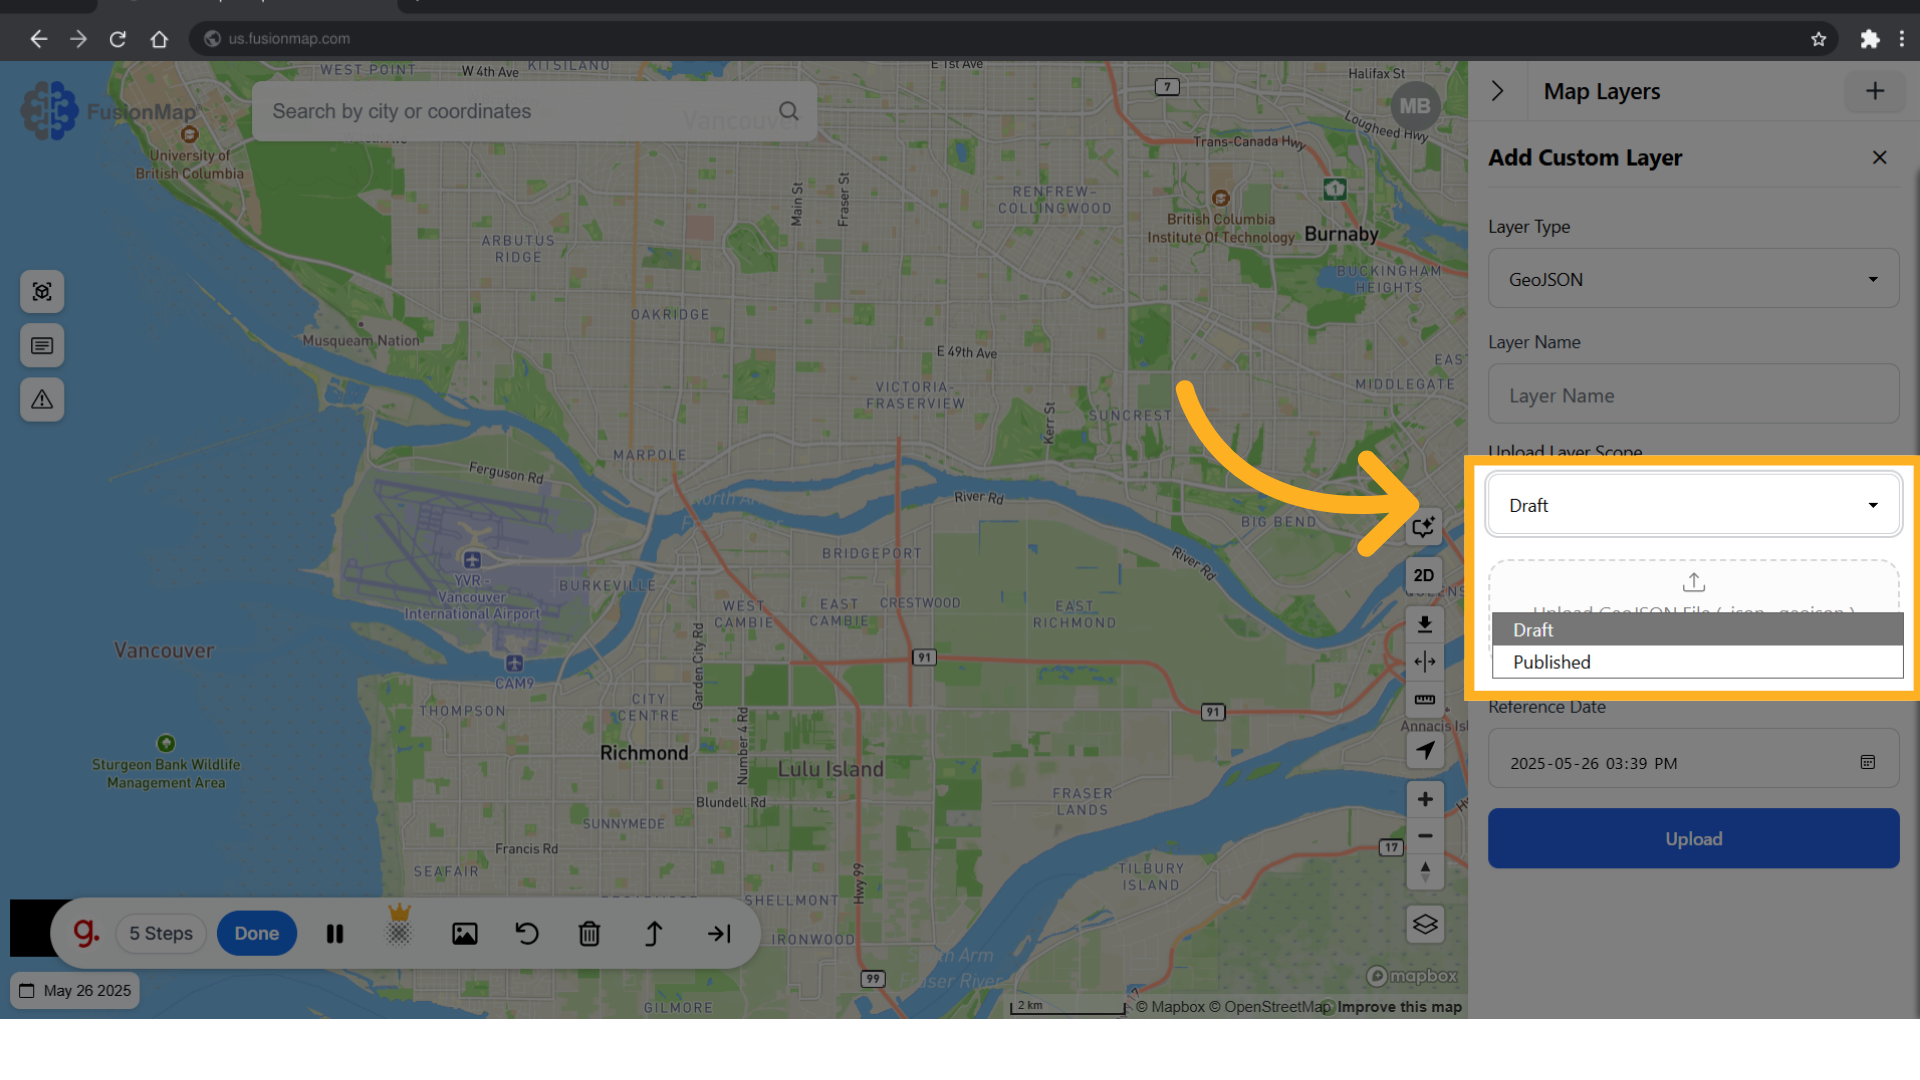
5. Choose between draft or published
Choosing "Draft" will only make the layer visible to you. Choosing "Published" will make the layer visible to all users in the project.
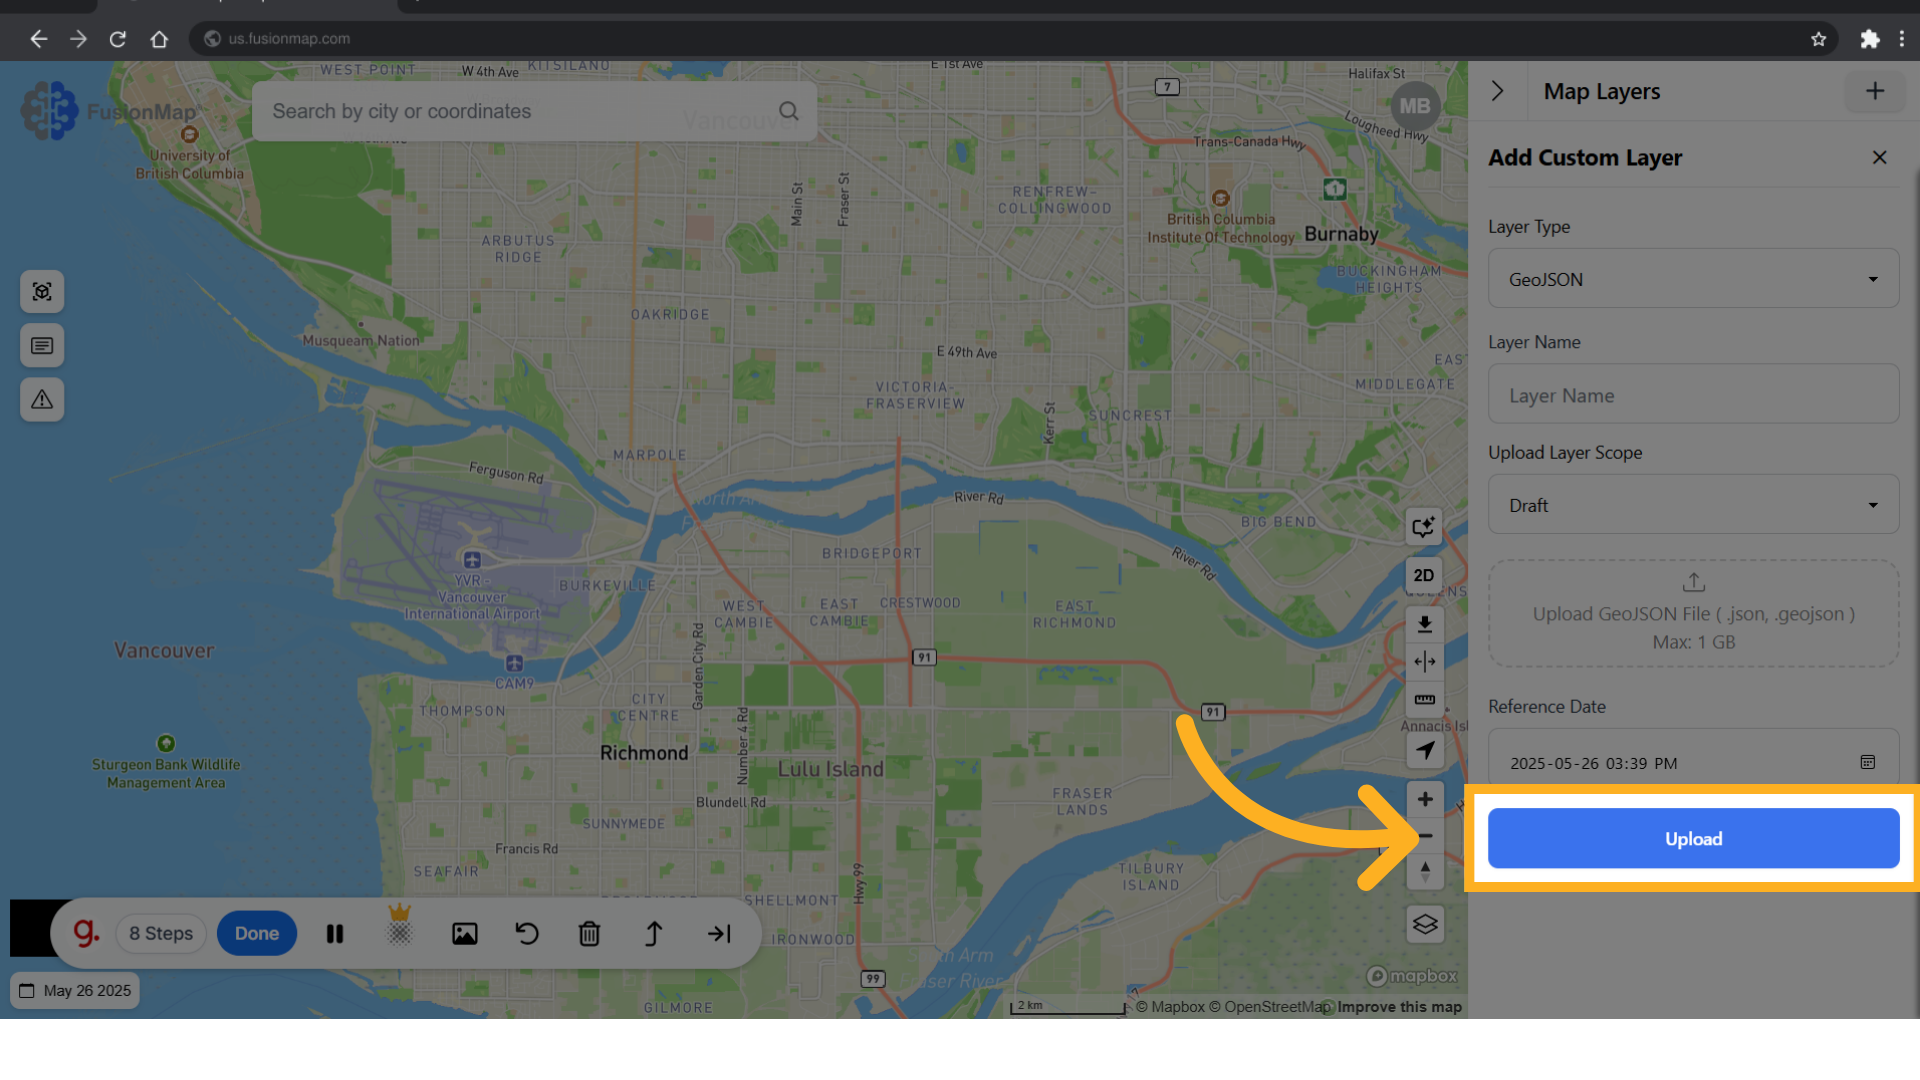
6. Upload the relevant file type

7. Click "Upload"
Upload your custom layer and visualize it from the layers tab.
You’ve now explored the general usage of custom layers in FusionMap, giving you the tools to better visualize and interact with your data.